Thursday, December 27, 2007

Lifesavers and Ketchup

Golly, I didn't intend to take such a long break, but my brisk Etsy sales (yay!) and holiday preparations kept me ensconced in my sewing studio and away from my blog. I hope your holiday season has been lovely and if presents are a part of your celebration, I hope you got some that made you happy.

I certainly did! For the "Lifesaver" portion of this post, I'll begin with a gift that saved me during my Etsy holiday rush:


It's a Yamata Iron Press that Chris gave me for my birthday/Christmas. I have no idea how well it presses clothing but for fusing interfacing it has no equal! Not to linger too long in hyperbole, this appliance reduces my production time dramatically. And it makes my least favorite part of sewing one of the most fun with its speed and cool sci-fi sounding steamer. Thank you, Chris!

Here's my second Lifesaver:


It's home-made chai that Chris' sister, Jen, made for me a few years ago. I rediscovered it in the back of a cabinet just in time to help me through some late nights sewing. It smells and tastes divine. Thanks, Jen!

And now for the Ketchup....or Catch-Up (yes, I am as word-geeky as that pun indicates). Here are some things I've been doing since my last post:

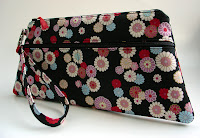
Making some new flare clutches...


...some custom order Passport Wallets...


...helping the oldest kidling with her school's craft fair...

...and making the Etsy front page!


(I missed the actual Front Page, but this is the treasury that made it. Thanks to you all who clued me in!)

I also hinted a while ago that a Rock Star might be visiting. Ann Wilson of Heart recorded a song in Chris's studio. Which is in our basement. So I got to answer the door for a Rock Star! She was lovely and kind and amazing to hear. The piece is for a production at Seattle Children's Theatre.

I have lots of yarn-y things to chat about, too, but I'll save that for another post.

Any presents you're especially happy about?

Monday, November 26, 2007

More On Photography

Thanks to everyone who chimed in on my "Photo-phobia" issues. I have a feeling that taking good pictures, similar to doing laundry, will be a constant bugaboo for me.

Here is the set up I've been using lately:


Chris made the collapsible staging area for me - it's great. I set it up in the dining room on a card table where we get the most light. I've been using banner paper for a background. Banner paper pros: it is white, inexpensive, readily available and easy to store. Cons: it's translucent and very grainy in cloudy light. And as you can see, we get a lot of cloudy light here in Seattle...

...which led to more research about camera and PhotoShop adjustments. Here are some more useful tutorials I found on Etsy's "Storque":

Bright Light, Big Color: Using EV and White Balance to Make Your Photos True to Life

On the Level: Making your Photos Pop with Histograms and Levels

Knowing how to make these adjustments is very useful, but I've come to the conclusion that I need to reduce those adjustments in the first place with better lighting.

My new plan: use professional photography lights.

My inspiration: Jenn Maruska and her husband, Josh.

Jenn has some of the most distinctive and pretty product photos.


Go and check out her Etsy shop if you've never seen it- it's ok, I'll wait until you're back.

Isn't her shop just lovely? Her husband, Josh, takes the photos and Jenn noted on her blog that Josh posted this excellent description of his set up and techniques at his blog. Here is Josh's set-up:


OK, now please go and check out Josh's post. It's very informative and the story of how he got his lights is excellent.

Wasn't that a good read? He's added some more information since I first read his post and now I have to go back to take some more notes.

Here's the crazy thing: after all my grousing about my photos, it all comes down to sheer laziness on my part because we OWN PROFESSIONAL PHOTOGRAPHY LIGHTS! I used them at the beginning of my Etsy adventure but got too lazy about setting them up and taking them down all the time (keeping the lights up isn't a practical option with kids in the house). Also, they are very hot and I got really sweaty. But I am now committed to using them and hoping that my results are half as professional as Josh and Jenn's.

Whew, such a long post about photography! Having high quality product photos is so vital to an on-line business, though, that I'm sure I'll revisit the subject in the near future.

Thanks to Josh and Jenn for sharing their behind-the-scenes look!

P.S. Jenn recently got one my Brown Bohemian Handbags and said some very kind things about it on her blog. Thank you, Jenn!

Saturday, November 24, 2007

Tutorials Galore!

Happy Post-Thanksgiving everyone! Did you have a good one? We had dinner at home and then hosted a Pie and Games party. I'm still trying to decide which pie I liked best, the Key Lime or the Chocolate Chiffon. Chris came up with the brilliant idea of taking our bounty of card tables (does anyone else own 6?) and setting up a clubhouse for all the kids. The kids loved that, but I think they were more intrigued by all their parents screaming at one another while playing Pit. So my Thanksgiving encompassed much of what I'm thankful for - family, friends, a home and good food (especially pie!)

And now that the feast is over, I can concentrate on getting some crafting done. That's something else I'm grateful for: all the tutorials on the net that rev up my imagination. Here's a few I've collected from blogs I regularly read:


This tutorial is authored by my pal, Liz. I have a pair of her earrings similar to these from her Etsy shop and they are gorgeous! I've often tried to sleuth out how she made mine and now I know (but I don't think my jewelry-making skills are nearly on par with hers!)


Isn't this adorable? This tutorial is from Quenna of blissful. I'm sure you've noticed her pretty wallets from her Etsy store and elsewhere. She's got a great eye for fabric and design. Aren't those kimono girls cute?

Make Fabric Labels

Photo from Allyson Hill

Allyson has an amazing Etsy shop. I'm entranced with her new Drop Sacs.

For the "Galore" portion of this post, check out Sew, Mama, Sew. This fun blog is posting tutorials every day for the month of November!

What are some of your favorite tutorials?

Monday, November 19, 2007

"What? What? Wait, that's me!!"

This is what I said to the youngest kidling this morning when I was reading one of my favorite blogs, CraftBoom! Once a week, CraftBoom's Lisa features three Etsy shops and this week one is mine! I've mentioned CraftBoom! before in my post about excellent photography tutorials. It's an excellent resource for marketing a craft-related business and I highly recommend spending some time there.

Lisa also owns a lovely on-line shop, U-Handbag, that is full of all sorts of bag-making supplies and fabrics I covet. And she has another excellent blog for that shop, U-Handblog, which I haunt every day. AND she is a bag-maker extraordinaire who shares her expertise with a wide range of tutorials.


She is someone I highly respect and I'm honored she picked my shop to feature.

I kind of feel like Courtney Cox in that Bruce Springsteen video where he pulls her up from the audience to dance on stage. (Hmmm, does that reference date me as much as I think it does? Did you even know that Courtney Cox was in a video with The Boss long before she was Monica? Or that she was the ill-fated second girlfriend of Michael J. Fox on "Family Ties"? Perhaps I should just stop now.)

Speaking of rock stars, I might have one over to my house tomorrow for a recording session with Chris. I'll let you know who if the session actually happens!

Wednesday, November 14, 2007

Hello Old Friends!

Contrary to what my last posts would indicate, there has been more to my life than spinning and skeletons. I've actually gotten some sewing done!

I'm welcoming some old friends back to my Etsy shop this week. First is the Brown Bohemian Handbag:

So soft and cuddly. And also the subject of my very first blog post!

Next is the Blue Bangle Dot Wristlet Wallet:


This is one of my favorite fabrics but I couldn't find any more once I'd used up the 2 yards I purchased back in the days when I thought 2 yards was A LOT of fabric! Oh, the naive days of youth. I recently joined a fabric co-op and there was this fabric, just begging to be purchased. All those happy ovals of color never fail to make me smile.

I also have some brand new bags to add once I've taken some photos. (Which reminds me, I'll be doing a follow-up post about all the great tips and tutorials you told me about!).

PS. Here's a new Etsy related site to look at:

The Mini Blog

Sellers can post their Etsy Minis and buyers can browse by category. Go check it out!

Sunday, November 11, 2007

Tools of the Trade Revisited

Last night I had the pleasure of participating in another home craft show at my friend Leigh Ellen's house. Just like last time, it was a treat to meet some other artists and to see customers interact with my wares. And I made a good amount of sales!

I had lots of fun chatting with the artist set up next to me - Alizah, who makes lovely hammered jewelry. One thing we discussed was the cost prohibitive-ness of starting a new craft. That made me think of my latest spinning obsession and that I'm pleased as punch to have spent very little on my spinning gear (which leaves more pennies to spend on lovely batts and rovings).

So here is another Tools of the Trade posting, but this time about spinning:


1. File Holder Lazy Kate (free)
This broken file folder holder was destined for Goodwill until I realized I can suspend my drop spindle between the sides to wind yarn into a ball.

2. PVC Niddy Noddy (free)
Using these directions, I made my niddy noddy from PVC pipe I scrounged from the basement. The pipe is from a display rack Chris made for me a long time ago (I spray painted the rack gold for festivity's sake).

3. Drop Spindle (free)
Another perfect gift from my uber-crafty mom.

4. Pestle Nostepinde ($1.50)
My nostepinde (ball winder) is a pestle I got from the fabulous Daiso shop. At least I think it's a pestle because the packaging was in japanese. (As a side note, I love to shop at Daiso and look at the great packaging graphics of angry sponges yelling at dirt and happy containers welcoming left-overs.)

Do you have any "Craft Gear on the Cheap" tips to share?

Monday, November 05, 2007

It's November???

Whew, we survived Skeleton Theatre! We ran the show on Halloween and the following evening. Technical difficulties prevented us from starting on time on Halloween but after that the shows went very well. Here's some pics:


If you are interested in some behind-the-scene pics, you can check out Chris' flickr stream.

I didn't have any time to sew during the mayhem, especially since my sewing studio moonlights as the guest room and our very good friends from LA flew up to partake in the skeleton fest. However, I did sneak in a little spinning here and there amidst the cooking of lots of food, making of t-shirts and figuring out how to velcro a light sabre to a skeleton's hand.

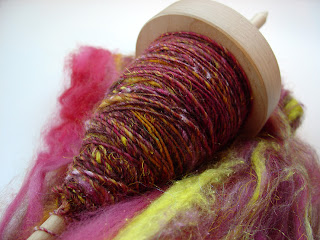
It's a lovely carded batt from Enchanted Knoll.

I have a feeling that I won't be spinning for a while, though, because I just looked at the calendar and it is NOVEMBER! I think my mental calendar stopped at Halloween. Now I'm in scramble mode to get ready for the holidays...and my birthday! My birthday is at the end of the month and I'm planning a little treat so check back later.

I hope you had a great Halloween!

Thursday, October 25, 2007

Skeleton Theatre

There is a long tradition of Halloween productions in my family beginning with my dad's Percy the Pumpkin Man, continuing with my husband's many creations. This year we're doing Skeleton Theatre again.

It's a massive undertaking so I'll be busy with that for a little while, feeding lots of volunteers, making sure no one gets electrocuted and providing first-aid amidst all the kidling-related Halloween minutiae I've volunteered for. I'll be back to the blog once Halloween has passed and I've recovered from the excitement.

Have a happy Halloween!

Wednesday, October 17, 2007

Photo-phobia

Hurray! I just listed this "new" Passport Wallet in my shop:


It's "new" because I actually finished it 2 weeks ago but had been putting off photographing it. I'd been suffering from a case of Photo-phobia because my application to the very cool design site, trunkt, was recently rejected and I fear it's because of my photos.

After moping about it for a bit, I went in search of some help and the following tutorials gave me some excellent photography and Photo Shop tips:

Taking Professional Looking Photos Without a Professional
-by Lindsay Landis of Lindsay Designs, from The Switchboards

How to take and edit professional looking photos of your craft products-a tutorial
-by Lisa Lam, from CraftBoom

A Photo Shop Tutorial-Back to the Basics
-a You Tube Tutorial found at Etsy's The Storque

I also spent some quality time with the instruction manual for my digital camera and learned a lot about all those mysterious letters and numbers and white balance and such.

So, I don't know if my photos are any better than they were but at least I feel more educated about the process! Do you have any photography tips or tutorials to share? Leave them in a comment and I'll try and do a follow-up post with your suggestions!

Saturday, October 13, 2007

Catch-Up

I've been playing catch-up the past few days. Catching up on bills, some Etsy orders, neglected emails, dishes in the sink. Now it's time to do some blog catch-up!

First, thank you to everyone for your input about a strap-line! I loved hearing your strap-lines:

"Handmades with style"
-Plumm

"Hatching Inspiration; Moments in Flight"
-Freckled Nest

"Handcrafted Limited Edition Jewelry"
-A Pretty Rock

"Vintage Inspired Designs Made for Today"
-Vintage-At-Heart Designs

(I'm still working on mine.)

Second, thank you for all the lovely comments about my Flare Clutches. I wish I were better at responding to your kind comments in a written form instead of chatting at my monitor as if you could hear me!

Third, here's an update on my spinning adventures. I've been squeezing in a little bit of spinning between sewing projects. I find spinning to be very restful and meditative. Kind of like what sewing used to be before I started sewing "professionally."


This skein is "Sonoma" from Maine Woods Yarn. This was my first attempt to spin and ply a large-ish chunk of wool using only my drop spindle. It's a little slubbier than I like.


Here's my second attempt-"Hyacinth". I like that the yarn is more even. And I love the contrasting colors! The roving for this skein also came from Maine Woods Yarn.

I think I'm going to knit up some scarves for myself and the kidlings with these skeins. I'll let you know how it goes.

What have you been catching up on lately?

Friday, September 28, 2007

Tutorial: How to re-thread a zipper pull

I love all the tutorials floating around the web. I fully admit to late night googling, trying to find out how to make your own niddy-noddy. In the spirit of giving back, I now offer this small tutorial on re-threading a zipper pull:

***************************************************

One of the most vital products in my sewing studio is "Make-A-Zipper".


Economical and easy to use, I just measure the length of zipper I need and snip it off. One peril of using it, however, is over-zealously zipping the zipper pull off the zipper!


After much forehead slapping and abandoning perfectly good zippers, I came up with the following way to rethread a zipper pull.


1. Separate the zipper tapes


Just pull the tapes apart - they should separate fairly easily.


2. Get 2 strips of masking tape


I usually make mine around 2 to 2 1/2 inches long.


3. Make masking tape tabs


This is the important step. Carefully line up one side of the masking tape along the outside edges of the zipper teeth, making sure to leave about three-quarters of the tape hanging off the end. Then fold the masking tape back on itself to the other side of the zipper, creating a little tab. Now do the same to the other side of the zipper.

4. Thread one side of the zipper


Thread the zipper tape through one side of the zipper pull. You'll feel the teeth click as they enter the pull. I usually slide 2 or 3 teeth into the slide.


5. Thread the other side


The tab is helpful for this step. Tugging firmly but gently, thread 2 or 3 teeth through the other side of the pull.

6. Start zipping


This is where you'll see the tabs in action. Firmly hold both tabs in one hand and pull on the zipper pull with the other. You may have to change the angle of your zipping hand slightly to get the pull to move. Try wiggling your hand around and soon you'll start feeling the zipper pull zipping.

7. Hurray! Your zipper is happily re-threaded!


Now take a look at your re-threaded zipper. Your zipper tapes may be misaligned a little bit. If that's not a problem, then sew away! If this is a problem, start the process all over again. But you're a pro at this now, so it will only take a few seconds!


Note: I've only tried this method with nylon coil zippers. I'm not sure if it would work for zippers with molded plastic coils. This technique also applies only to zippers without a zipper stop.

Let me know if you have any questions or if this tutorial is helpful. I know I'm thrilled with my home-made niddy-noddy!

Friday, September 21, 2007

Flare vs. Flair

Yippee! I've moved out of the prototype stage to the production stage for my new handbag! Here they are...the first three from The Flare Clutch line:


I've gone back and forth in my geeky English Major way between calling it the Flare or Flair Clutch. I decided on "Flare" since it is more physically descriptive but I'll call in "Flair" in my head for my own amusement.

I'm excited about the pockets in this bag. There are two exterior pockets accessed from the same zipper that can hold lipstick, credit cards or slim flip phones. Inside is a slip pocket that is sized to fit cash.


I'm hoping to start carrying them in my shop this weekend!

Wednesday, September 19, 2007

I need a Strapline

One of my favorite blogs is Lisa Lam's U-handblog. The blog is related to her on-line shop, u-handbag.com which sells lots of great bag making accessories. U-handblog is chock full of useful stuff: sewing tutorials, tips on running your own business and inspirational photos of handmade bags [Editorial comment: my Retro Blue Dots on Brown Handbag Set is one of this month's U-Handbag's flickr Faves. Again: feeling a little like a rock star!]

Anyways, Lisa just started a new blog, CraftBoom, about running a craft business. Her latest post is "Ways to Market Yourself & Your Craft (on the cheap)" and has the following suggestion:

Get yourself a strapline (as defined by Wiki). A strap line is a useful bunch of words that serve to reinforce /inform (in a quick & simple way) just what your craft business is/provides. I’ve had my strapline “Love Bags, Make Bags” from the beginning and I hope that from reading it, it is obvious to the reader that my craft business is involved in handbags, and handbag making. When my strapline appears alongside my logo is serves to inform people of what my business is (in case you can’t tell from looking at the logo in isolation.
I need a catchy strapline. Do you all have any suggestions? Do you have a strapline?

Monday, September 17, 2007

My Favorite Things

At our house, the latest disc taking up permanent residence in the DVD player is "The Sound of Music." I've been struck anew at the hottie-ness of Captain Von Trapp and the girls have learned about the evil-ness of the Nazi Party. In honor of Maria and her charges, here are some of my latest "Favorite Things."


Aren't these magnets and buttons cute? I got them in a lovely little package from my good bloggie pal, Steph. She recently had a give-away on her blog and I was one of the winners. Yay! I'm particularly enamored with the Etsy pin. It will be going on my jacket momentarily. She also included one of her moo cards...those are so cute! I'm still trying to decide if I should invest in some but the long box of business cards I just received keeps holding me back.


Here is a ring I bought myself to celebrate my 1 year Etsy Anniversary. It's a Slinky Ring made by Horizonte. I love the textures and colors. It's also very light and doesn't snag so I can wear it while sewing. (I took some pictures of this lovely ring on my finger and immediately deleted them. I have singularly unattractive hands - great for sewing and creating, not so great for modeling. I get hand envy whenever I see Blissful's or JPAT's pretty hands in their listing photos!)


Finally, some of my desk companions. The blue puppy is a pencil sharpener we gave the oldest Kidling for Christmas that I have co-opted. His little ears flap when you sharpen a pencil with his tail/crank. He is also emptied in a surprisingly anatomically correct fashion that the youngest kidling likes to call, "Changing the puppy's diapers." Finally, there is my "Shakespeare Insult Mug." It holds lots of coffee and makes me laugh. I especially like "Not so much brain as ear wax."

Really, Captain Von Trapp is just yummy!

Friday, September 07, 2007

"That's a lot of cards, Mommy!"

So said my oldest kidling upon seeing my recently arrived box of one thousand business cards.


I have to say I agree with her. After ordering a hundred cards here and there, I did some cost analysis (ooooh, look at the business-y type words!) and realized I should just buy 1,000 at a time.

Of all the things I've done related to my Etsy shop, this one has given me the greatest pause. Looking at that dauntingly loooooooong box of cards makes me realize I'd better work hard so those little slips of cardboard have lots of places to go, either through marketing or sales (there I go again with the business talk!). Wish me luck!

Sunday, September 02, 2007

Back To School!

I have to admit to having a certain wistful feeling on the first day of school for the past few years. While part of it was sending the oldest kidling off to another year of elementary school, a lot of my wistfulness was missing that sense of anticipation a new school year brings.

This Septmember, however, I've got something to be excited about: I've been busy in my studio making some new things for my Etsy shop! It's not quite the same as getting a box of 64 crayons with the built-in sharpener but pretty darn close. I'm especially excited about a new handbag design I've been working on. I'm still tweaking the design a bit but hopefully I'll have some ready in the next week or so.

I've also been making some new 3 Pocket Flip Wallets from my big stack of fabric. Here's a sneak peek:


Are you excited for Back-To-School season?

Tuesday, August 28, 2007

Mary Grayson

My latest crush: littleputbook's Studio Shot Tuesdays flickr group. I love to see everyone's creative workspaces and tools and such. My contribution today is a shot of my dressform/handbag model:


My husband and the kidlings named her "Mary Grayson" (due in large part, I think, to her gray covering). She's almost like a member of the family. I catch the kidlings hugging her all the time.

Mary is currently dressed in a kimono I got at a sale my friend, Emiko, had last week. Emiko just got back from Japan, bringing a suitcase full of lovely kimono pieces with her. This was one of the intact kimonos she had that she assumed would be taken apart and made into something else. The kimono is so beautiful, though, I can't bear to cut it up so now Mary has a new outfit.

Above Mary's head (or lack of head, I guess) is my shadow box of little things I've collected over the years. Here's a close up of some of my favorite tchotchkes:


The white buddha is a chop with my chinese name, the sandpainting is from a trip to New Mexico I took with my best pal Lori and the "bad dog" pin is a gift my husband bought from The Cambridge Artists Cooperative. I got the Terracotta Warrior on a trip to Xian and the little native american was a gift from my mom. The origins of everything else are lost in the sands of time.

Friday, August 17, 2007

It's all about me!

I finished making a knitting bag for myself the other day!


This is the first bag I've made expressly for my own little self in the longest time. Most of the bags and wallets I use are either prototypes or goof-ups. I'd seen so many cute knitting bags like this one on Etsy that I wanted one too. I adapted a commercial pattern to make it capacious enough and I used my serger, which has been sadly neglected of late. There are some things about this design I would tweak if I ever make this bag again (including the use of said serger) but on the whole I'm tickled pink.


Here's a peek inside with the latest example of my sock obsession. This yarn + this pattern = the coolest socks ever....blog post forthcoming.

And for some more me-centric news - the wonderful Dandelion Blu has tagged me a


I get called "rockin' " so infrequently in my current state of perpetual frumpiness that this tag is even sweeter. As a newly instated Rockin' Girl Blogger, I get to dub 5 of my own and I pick

Adornments and Distractions
freckled nest
Jenn Maruska's Blog
Mill Girl
rhembein

Thanks so much, Dandelion Blu!!