Monday, June 01, 2009

Giveaway Day Winner!

Thank you to everyone (all 461 of you!) for entering my giveaway! Without further ado, the winning comment number is:

Cindy who said,

"I was Smurfette one year, way back, when the Smurfs were popular. It was a lot of fun."

And, again, thank you so much to everyone who participated. Reading about your costumes made me laugh and cry. So many of you have such happy memories of your mothers, fathers, sisters, brothers or grandparents making costumes for you. And I relished hearing about all the costumes you've made for your own children or siblings. Thank you so much for sharing them with me!

And thanks again to Sew, Mama Sew! for organizing another excellent Giveaway Day!

Tuesday, May 26, 2009

Giveaway Day - Quilting Kit

Happy Giveaway Day!

For Sew, Mama, Sew's Giveaway Day, I put together this little Quilting Kit:


It includes:

*Scraps from about 50 different fabrics

*2 spools of 100% cotton hand quilting thread

*A measuring tape

*10 quilting needles (Size 10 betweens) in a wooden holder

*An off-hand thimble

*A 12 inch by 14 inch project bag I made with a thrifted sheet, using Betz White's Tutorial


Here's a better view of some of the fabrics. These were culled from my frightfully large scrap box. The scraps range in size from 4 inches by 4 inches up to 10 inches by 26 inches. Most are 100% cotton and most have not been pre-washed.


So how can you win this cute bag of goodies? By leaving a comment answering the following question:

"What was your favorite Halloween costume?"
(It can be a costume you wore or one you made for someone else)
Edited to add: I apologize to international folks for forgetting Halloween is not a world-wide holiday. Just leave a comment about any costume you've enjoyed!)

And what does this have to do with quilting? Sorting my scraps reminded me of a costume my very crafty mom made for me: The Patchwork Girl of Oz. Much to my dismay, none of my classmates knew of this obscure character and assumed I was Raggedy Ann. My mom, being the cool mom that she is, probably foresaw this possibility but still indulged me and put in a lot of effort to make me a costume no one would recognize. Thanks, Mommy!

On June 1, I will select a winner at random from all the comments telling me about a costume left between May 27 and May31. I will also pay for shipping charges (either domestic or international).

Thanks very much to Sew, Mama, Sew for organizing this and be sure to go check out all the other participants here and here!

Thursday, May 21, 2009

Tutorial: Hemming Cloth Napkins


Last month, I sewed up several sets of cloth napkins for my oldest daughter's "Green Team" Earth Day Fair.

The napkins were a fast and easy way to reduce my fabric stash, so I thought I'd share this tutorial with other fabric addicts to help reduce both their stash and their trash! These napkins are cute and casual with tidy mitered corners. There are lots of other good napkin tutorial out there. I adapted techniques from this tutorial to make my napkins.

MATERIALS

*Prewashed cotton fabric
*Clear ruler
*Water soluble fabric marker
*Awl or seam ripper
*Rotary cutter
*Pins
*Scissors

Not pictured
*Cutting Mat
*Rotary Cutting Ruler
*Iron
*Sewing Machine
*Thread to match (or contrast, if you're so inclined) your napkins

CUT OUT YOUR NAPKINS

The napkin pictured above is a 12 inch square. This technique uses a 1/2 inch hem allowance so my finished napkin is an 11 inch square. Feel free to change your dimensions as dictated by your napkin needs. I recommend using a rotary cutter, but scissors will due in a pinch.

MARK THE HEM ALLOWANCE


Using the water soluble fabric pen and the clear ruler, mark a line 1/2 inch in from the edge. Repeat on all sides of the napkin.

CLIP THE CORNERS

To reduce bulk when you miter the corners, clip the corners using the marks you just made as the start and ending points of your cut.

PRESS THE HEM PART I


Carefully fold the edge of the fabric up to the marked line and press with a hot iron. Repeat on all sides.

MITER THE CORNERS

Now it's time for the fun part: mitering the corners.


At one corner, open up the fold on Side B.

Carefully fold Side A along the marked line, enclosing the raw edge.


Fold the corner down, lining up the folded edge from Side A with the marked line on Side B. I found my awl very helpful for the following maneuvers because I've got chunky fingers. If you don't have an awl, a seam ripper works well, too.


Refold Side B to the marked line, making sure to keep your corner folds tidy. Again, I would have been lost without my awl to help with this.


Finally, fold Side B along the marked line, enclosing the raw edge. Isn't that a pretty miter?

Pin the miter in place.

PRESSING THE HEM PART II

Continue around the napkin, mitering the corners and folding along the marked line to finish the hem. I like to press the hem again after the final fold, although if I'm in a slap-dash mood, I'll just pin the final hem in place. You can also try pressing both hem folds before mitering the corners. It didn't work out so well for me because the extra folds interfered with my miters but you may have much more nimble fingers than I do and end up with great results.

SEWING THE HEM


Starting in the middle of a side, begin top-stitching the hem. I stitch about 1/8 inch from the fold.

SEWING THE CORNERS

Keeping the miter in place while sewing it is a bit fiddly.

Hopefully you can see how I use my awl to keep the miter in place while it moves closer to the sewing machine needle.

Sew until your needle makes its first entry into the miter. Leave the needle in the fabric and pivot the napkin.


Here's my awl, again. This time it's gently pushing the fabric under the presser foot until there is enough fabric for the feed dogs to do their job. Be very careful, though, to keep your awl or seam ripper away from your sewing machine needle. My awl strayed too close once and the sewing machine needle shattered. (Stray bits of needle can really spoil a nice spaghetti dinner.)

Here's what the miter looks like from the back.


And here it is from the front.

Continue sewing around the napkin until you reach the beginning of your stitching, make a few back stitches, clip your threads and you're done!


Here are some of the sets I made for the Earth Day Fair:


And here is the pledge my daughter wrote for her Green Team:

I promise now,
I make my pledge,
To turn off lights
And do what's right.
We encourage now
The human race
To make the world
A better place.

Let me know if this tutorial worked for you or if you have any questions. And Happy Belated Earth Day!

Wednesday, May 06, 2009

Crocuses and Cuteness

On those abysmally rare occasions when I'm weeding my yard, I love the thrill of finding a little crocus peeking out of a forgotten corner. Well, I found some little crafting crocuses in the corner of my notions box and I had some very cute, albeit slightly wonky, results!

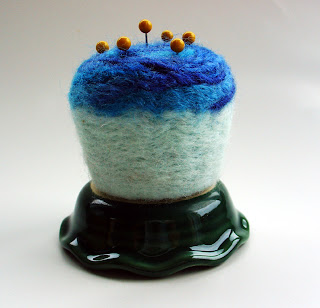
But first, I have to show you cutest pin cushion ever:

It arrived unannounced in my mailbox a while back. The lovely Liz, of madeinlowell, makes these pin cushions as well as a multitude of other amazing wares. Thank you so much, Liz!!

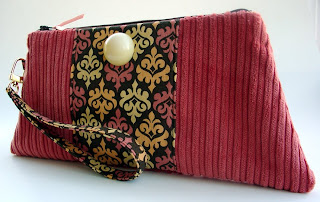
Back to my metaphorical crocuses. First I found some metal purse frames that I bought months and month ago and promptly forgot about. I made this little clutch for my pal, Alizah:


I used Lisa Lam's most excellent tutorial to make the pattern and attach the frame.


Lisa's tutorial is terrific, but I discovered that I'm seriously adhesive impaired. I felt like I was in a Marx Brothers movie with glue and paper and bits of thread sticking to me, all the while yelling at the glue to behave. But I eventually got it together and I think Alizah likes it!

I also found some bobby pin blanks and cover-your-own-buttons and made these bobby pins with scraps from my gargantuan scrap box:


I sold most of them a Alizah's trunk show. They were such a hit that I think I'll make more.

I've also been flirting with Twitter, lately. I have yet to tweet but I love reading other people's posts. Do you have any Follow suggestions or Twitter tips or hints? I'm still flummoxed by hashes and @s and the like. I added a Twitter button over there on the side bar which I hope works...

Happy Spring!

Friday, March 06, 2009

"The Envelope, Please"

I love award shows with all of the pomp and statuettes and really big envelopes (and accountants in tuxes guarding those big envelopes). And yet, I missed the Oscars this year. Again. Since I've had kids, though, I've managed to miss most of the nominated movies every year and am not emotionally invested in the outcome. [Note: I am always emotionally invested in Oscar Fashions and find Go Fug Yourself to be invaluable for my Red Carpet fix.]

But, really, all this envelope talk is just my goofball way of introducing my Envelope Wallets:


I'd gotten a few requests for a wallet larger than my 3 Pocket Flip Wallets but smaller than my Passport Wallets. "Easy Peasy!" I thought. Well, countless prototypes later, I finally came up with a design I like.

It's really just a mash-up of my other wallets but I had the hardest time wrapping my head around the design. I also had fits about which interfacing to use. My final design ended up using 3 different weights. The one pictured above uses a sheet I got at the thrift store. Yay, upcycling! I think I'm going to try using more upcycled fabrics.


These three are now listed in my shop and I hope to make some more in the near future.

I've also gotten some questions about the pattern for this wallet. I've been thinking of self publishing some of my patterns...do any of you know how to go about this?

ps Sometimes I practice an Oscar acceptance speech in my head...

Monday, February 16, 2009

Crafty Badger

One of the best Christmas gifts at our house last year was the game, Crafty Badger. My husband and the oldest kidling bought it for the youngest kidling and it's our new favorite game:

It's made by the German toy company, Haba, and I'm in love with the metal suitcases and the cheeky wooden Badger. The game involves packing for a trip in the midst of reoccurring badger attacks, wherein said badger dumps out a suitcase at your feet and you have to repack the clothes. A rather surreal scenario, I must admit, unless sneaky badger attacks on unattended luggage is common in Germany. But we all love yelling "BADGER!!" when the little badger face turns up on the die. And, again, those little metal suitcases are the cutest!

Friday, February 13, 2009

Happy Valentine's Day!

I made Valentines this year for the first time in a long while! They are little felt heart pins and I think they turned out quite cute, if I say so myself.


The pins came about through a harmonic convergence of the perfect project and materials I already had on hand. I got a lovely stack of felt squares via Jenn's blog a long time ago. The squares sat sadly in my craft closet until I found Purl Bee's Valentine Pin Tutorial. The project was fun, fast and easy. I also got to spend some quality time with my pinking shears (which as a serious sewist, I'm embarrassed to admit I've never used).


I mounted each pin on a little card and sent them off to some of the special women in my life - family, friends, the kidlings' teachers and some of my crafty heroines. I even managed to save one for myself.

I hope you have a wonderful Valentine's Day!!

Monday, January 05, 2009

Passport Wallet Instructions

Happy New Year!

While I have some pics and musings to share about my holiday, on the top of my Big List of Things to Accomplish This Year is making available the instructions to the Adorn Magazine Passport Wallet I designed a while ago. Sadly, Adorn folded sometime last year, so the instructions are no longer available. I've gotten several inquiries about the instructions and I finally typed up them up.

And here they are:

Passport Wallet Instructions (PDF)

UPDATE (February 21, 2010)

The Adorn site has finally closed down and I fortunately have a copy of the pattern piece templates (many thanks to my husband for helping me figure that out!). I have also updated the link in the sidebar if you'd like to use that one instead. Here are pattern pieces:

Passport Wallet Pattern Templates (PDF)

The instructions are a very basic PDF document with no graphics or photographs (concepts way beyond my ken). I modified the instructions I wrote for the magazine, so hopefully they are clear and easy to follow. Please leave me a comment if you have any questions about the instructions and I'll do my best to help you out.

Converting a document to a PDF and figuring out where to store it was all new to me, so I went to my bag-making/craft business guru, Lisa, at U-handblog and CraftBoom and she, of course, had all the information I needed.

Whew! I'm glad to have that checked off my Big List! And because I always like blog posts with pictures, here's one my favorite passport wallets I made last year:

Monday, December 08, 2008

The Winner!

Thank you so much to everyone who participated in Give-Away Day! I was utterly floored to receive so many comments and thoughtful answers to my "Best Prize" question. But first, the winner!

Because of the high number of comments, I had to forgo my original plan of pulling slips of paper out of a hat, so I used random.org and had the eldest kidling push the select button. And the winner...

Threaded Basil! I'll email you for your address to send off your padded pouch! Yay!!

I loved reading all of your comments. One of the most touching and frequent answer to my question was the prize of spouses or children. Ingrid's champion spaghetti eating son made me laugh and laugh.

Thanks again to everyone who played and shared with me!! You're all winners in my book (was that to schmaltzy?)

Tuesday, December 02, 2008

Today is Give-Away Day!

One of my absolute favorite blogs, Sew, Mama, Sew, has declared today Give-Away Day! I slipped my blog in just under the wire to participate.

Here's how it works. Today, lots and lots of crafty bloggers are all giving away something hand crafted or items to aid and abet a hand-crafter. You can enter to win by leaving a comment on their individual blogs. I love this idea because it's always cool to win something but even cooler to find crafty blogs!

Here is my give-away item. It's the first of my Padded Pouches:


I am especially charmed by the interior:


I'm a sucker for a good stripe.

Unlike my other pouches, this pouch is a little smaller and padded with cushy fleece. It's got a cozy feel and the fleece adds some extra protection for anything delicate that lives in the pouch. I'll be adding this pouch to my shop later today.

To win this pouch, leave a comment answering this question:

"What is the greatest prize you've ever won?"

Post your comment by 7:00 pm (PST) on Friday, December 5th, and my random number picker (ie, whichever kidling is closest to me at picking time) will select the winner. I'll ship off the pouch early next week and pay for domestic or international shipping.

Thanks for playing and go check out some other blogs!

Monday, November 17, 2008

Whatcha been up to?

Hmm, I've been up to a variety of stuff lately - and as you can tell by the vast amount of time since my last post - none of which has been blogged. I think I have to admit to myself that I'm a sporadic blogger. (Ooh, I'm going to name my next band "Sporadic Blogger"!)

Lots of October was taken up with our annual Skeleton Theatre project. My husband and some of his friends build animatronic skeletons which perform on Halloween and the night following. This year was "Pirates of the Scary Beings" with 4 skeletons, a parrot, a huge talking skull and 2 pirate ships in our front yard. Chris wrote an original script, hired some of his actor friends to do the voices and once the electrics dried out from a Seattle deluge, we had quite a show! Along with my cooking duties, this year I was costume mistress and tooth creator.

Two of the pirates are of the dandy variety, so we got some coats from the thrift store and I fancified them with lots of gold trim and hot melt glue (Crafting note: do not listen to David Sedaris while working with hot melt glue - burned fingertips are the inevitable result of this ill-fated mixture!). Here's the finished result:

That's Captains Black and Blue. They are the evil pirates. To see a little behind the scenes, check out this lovely write-up from my favorite local news blog.

Once Skeleton Theatre finished up, I played around with my new loom! My sister scored an Easy Weaver loom at a thrift store and gave it to me for an early birthday present. Thanks, Cam! It took a little time, 3 books from the library and some googling, but I finally managed to weave a fairly presentable scarf!

I started with this poorly dyed (and photographed) roving I did in the crock pot:

Spun it into this sloppy yarn:


Had a blast weaving it on my Easy Weaver:


And ended up with this scarf:


I'm amazed. Colors that looked so wan and icky as roving and yarn blend so well once woven. I'm very pleased with my scarf and itching to warp my loom again.

Monday, September 15, 2008

The Winner!

Yay, I have a winner for my "Pouches-A-Plenty" Giveaway! Thank you to all who entered. I have to admit to a bout of hostess stress when I announced it - "What if nobody enters?" I loved everybody's "P" words, too. They made me hungry and delighted all at once.

So with the help of my randomizer (aka the youngest kidling):


My winner is Sue! I'll be contacting you so I can send off your prize!

And here's a pouch update:


It's my "Retro Kitchen" set. Aren't they cute and kitschy? I'll have some more updates later in the week.

Thanks again to everyone who entered my little contest!!

Tuesday, September 09, 2008

Project Pouches-A-Plenty

Hurray! My sewing experiment has been so much fun and as a result I have a nice passel of pouches for my shop!


I decided to focus on pouches because they are small and quick to sew - qualities of high appeal to someone having a bout of creative attention deficit disorder. My goal is to list something new everyday for the rest of September. We'll see if I can maintain my creative burst of energy.

To celebrate my plethora of pouches, I'm having a Project Pouches-A-Plenty give-away!

The rules:
1. Leave a comment for this post by Saturday, September 13
2. Indulge my word geekiness by including your 3 favorite words that start with the letter "P"

I'll pick the winner at random on Sunday, September 14.

The prize:


It's the first in my Circle Pouch collection. It's the perfect size for those little things that rattle around your purse.


I'm also excited about the first Project Pouch that I'm putting in my shop today:


It's a simplified version of my Flare Clutch but it can still qualify as a gussied up pouch, can't it?

So go ahead and leave a comment to enter the give-away and I'll leave you with my favorite movie quote populated with a prodigious amount of "P"s:

"Waiter, there is too much pepper in my paprikash. But I would pleased to partake of your pecan pie."
-Harry Albright in "When Harry Met Sally"

Friday, August 29, 2008

Riding the Pendulum

First off, thank you for all the kind comments about my Training Wheels post. The youngest kidling will be starting school this coming Wednesday and I'll let you know how we do. I have a feeling I'll be the one in need of kleenex and a big hug.

So, for the 2 of you who regularly check my shop (Hi Mom, Hi Cam!!!), you may have noticed a distinct lack of anything new for, lo, these many months. Part of that is due to life stuff (and to what Chris aptly calls my spinning addiction) but I think a lot of it was because I burned myself out.

I have ideas for new products all the time, but when I'd sit down to plan and prototype, I'd get caught up with the minutiae of long-term production - "How can I most efficiently cut this out multiple times?" or "How will I stream-line sewing?" - and my eyes would glaze over and I'd wander off to rustle up a snack. These are very important considerations and my business model has served me well, but I've decided to take a break from it and just create stuff for fun, even if I'm only making it once or twice.

So I'll be spending the month of September swinging my sewing pendulum over to the more creative side and see how many new items I can dream up. Actually, I've already started and finished this last night:


I'm even considering a little give-away to celebrate! So check back sometime after Labor Day for details. And I'll also try and do a few blog updates about my little experiment.

One last thing, I want to give a very very belated congratulations to my bag-making buddy, JPAT for being a Featured Seller on Etsy last month. You go, girl!! Check her out - her wares are lovely!

Saturday, August 23, 2008

Little House in the Big...'Burbs

I've always been a huge fan of the "Little House" books by Laura Ingalls Wilder. My mom read them to us everyday while we ate lunch. I remember wishing that we could eat roasted pig tail, have a pig bladder for a balloon and that my dad would find an old wooden stump to turn into a smoke house. I was also impressed that Laura's only plaything was a corn cob wrapped in a piece of flannel (I continue to be impressed with that whenever I look out at the vast array of toys and trinkets spread throughout our house). Laura and her family were the epitome of DIY before DIY was cool!

Anyways, I've been trying to muster up some of that pioneer spirit lately. First off, I bought a bread machine the local Goodwill. Now, I know that a true pioneer would make her own bread from scratch, but trust me, I am the worst bread-maker in the world. I couldn't even call myself a bread-maker as much as a rock-baker. So it's been a treat for us to have home-made bread on a regular basis. Chris has requested sour dough bread next. Does anyone have a good recipe for sour dough starter?

I've also been getting more into dying my own wool for spinning. I've dabbled with dying in the microwave but I wanted to work with larger amounts of wool, so I got a crock-pot at Goodwill to dedicate to dying. Here's the one I bought:


I LOVE this one because it reminds me of the one we had when I was growing up. Actually, I think this avocado green one may match the crock-pot that replaced the mustard yellow one that someone (who shall remain nameless) put over a hot burner instead of using the heating element, thereby creating one of the most hilarious and smelly plastic messes my childhood kitchen ever saw. But I digress. Here is some of the wool I've dyed in the crock-pot:


And I've been spinning it with my new spinning wheel!


I did not get my wheel at Goodwill. It's made by a small, local company called Fricke. It's a single treadle, scotch tension, 5 ratio bundle of fun. It is a less expensive wheel than most out there but it spins wonderfully and I'm tickled with its small foot print and minimalist look. It was a gift from my wonderful parents (and really, I can use a spinning wheel far more than I could use a smoke-house made from an old stump). Here's some of the crock-pot wool spun up:

The other evening I had some wool simmering in the crock-pot, some bread baking in the machine, and my spinning wheel humming along and I felt a little like a modern pioneer in the 'burbs.

ps I've been doing some sewing, too!


In addition to sewing for my shop, I've been working on a submission for One Yard Wonders!